Presser Foot of a Sewing Machine
Let us begin with What is a Presser Foot of a Sewing Machine?
A presser foot is a detachable part used in a sewing machine which hold fabric flat as it is fed through the machine while stitching. The main function of the presser foot is to guide the fabric at a steady rate. A sewing machine can even work without a presser foot but it becomes the operator's responsibility to feed the fabric through the machine. There are different types of presser foot which are used to perform different functions. Using the right kind of foot can save a lot of time and effort. There are 2 different types of presser foot:- Snap-on Presser Foot
- Screw-on Presser Foot

30+ Types of Sewing Machine Presser Foot
- Braiding FootThis is a great foot for adding any of those decorative embellishments like ribbons, braids, sequins chains etc. Trims and Ribbons of the size 3/8 inches or fewer will easily pass through the hole in the foot. It comes with a screw that helps you to adjust the front plate forward and backward. You can stitch both zigzag and straight stitch as per your requirement.
- Fringe FootFringe Foot is also known as a Looper Foot. You can create loops which go back and forth over the center bar on the foot or you can cut those by switching back to a regular foot and sewing a side stitch through them which gives you a frill effect. You can take width of the stitch according to your choice. Use fusing paper or it should be thick cloth.
- 3 Groove / 5 Groove Cording FootThe cording foot is mainly used to add surface embellishment to fabrics. Yarns, thin braids or cords are held by the foot while decorative stitches are applied to the fabric. This foot can also be used for gathering. Stitch the cord to the fabric, when finished, pull the cord which will draw up ( gather) the fabric, Adjust the fullness of the fabric as desired, then knot the end of the cord to secure it. This foot has a specially designed slotted guide on top. This guide holds lightweight yarns or cords which simply slip into the guide from the side. You can use up to 3 cords depending on your requirement. There are grooves at the bottom of the foot which allow the cords to pass freely while stitching.
- Edge Joining FootIt is used to sew fabric edges together side by side. This foot can also be used for stitching the ditch sewing such as on quilts. Few of these foot already have a presser foot holder attached to it whereas few models are snap-on style. The functions remain the same in both the types. A vertical blade like projection at the center front area is used to guide fabric edges while stitching. This foot is also known as the Ditch Foot. Top stitch works very well with this foot. The fabric edges can be joined together while at the same time beautiful decorative stitches can also be created between the trim.


- Quilting Presser FootWhen it comes to quilting, this presser foot is used. It can accurately sew with seam allowance of 1/4 inch and 1/8 inch. The size markings are provided on the foot which make seams accurate from the edge. The straight stitching guide makes sure that the stitches are made absolutely straight. This foot is also known by the name "Piecing Foot".
- Straight Stitch Presser Foot (Basic)This foot is ideal to use every time you are sewing a straight stitch. The small needle opening allows the thread to lock more uniformly, thus producing a better looking stitch. Straight stitch foot is often used on very fine fabrics. The extra support of this foot helps to prevent delicate fabrics and knits from getting jammed into the needle plate as the fabric is being held more securely. This particular foot is flat on the underside to provide an even pressure against the feed dog and it has a rounded needle hole which offers the benefit of more support around the needle to prevent skipped stitches and puckering.
- Open Toe Embroidery FootThis foot is used to perform embroidery or to make wide decorative stitches. The wide opening at the front provides you more visibility while performing embroidery stitches. A transparent one made of plastic is also available in the market. The Open Toe Foot can be used for machine applique, decorative stitching and many types of surface embellishment. The foot provides a clear view of the stitching area, and the tunnel on the underside of the foot allows dense stitches or raised trims to feed smoothly under the foot.
- Round Bead FootBeading foot helps you attach strings and beads to your fabric. The 3 most common beading foot are the 2, 4 and 6 millimeter ones. The bottom of the foot has a channel or a groove which allows the beads to pass through it as you stitch. The needle passes through both sides of the beads and stitches them onto the fabric.


- Teflon Zig-Zag Presser FootThis Teflon coated foot can be used for both straight and decorative stitching on leather, vinyl, plastic or other fabrics that would stick, slip or slide under a normal (regular) presser foot. The coated backing prevents the fabric from tugging against the foot and allows it to glide through the machine with ease. The Teflon non-stick foot resembles a normal presser foot in shape but it is coated with or entirely made from Teflon. Teflon is the coating used in non-stick frying pans to prevent sticking.
- Cording FootThe cording foot snaps on to the existing shank and presser foot holder on your machine. The guide on the top of the foot has three slots in which to place cords. To load the cords into the slots on the top of the foot, simply slide the cords in from the right. It is used to add surface embellishment to fabrics with cords, thin braids or yarn...
- Pin Tuck FootThe pin tuck foot is used with a twin needle or double needle to create raised tucks in the fabric. The best results come from lightweight fabrics such as organdy and silk. The foot has multiple evenly spaced grooves on the bottom which keeps the tucks from being flattened. These grooves also ensures that each row is perfectly parallel to the previous one. Corded Pin Tucks also can be made with the help of this foot. It is typically found with 3, 5, 7 or 9 grooves on the bottom.
- Overcast Stitch FootThis foot is also known by the name Overedge Foot. The style of the foot may vary slightly, but they work essentially the same way. It is used to add a seam finish at the edge of the seam allowance. It can also be used to sew a seam while at the same time sewing a edge finish. The overcast foot has a small prong or bridge within the stitching area of the foot which allows more thread into the stitch. There is an extension at the front for the foot to guide the edge of the fabric for sewing seams or seam finishes. You can use zigzag, multi stitch zigzag or an over edge stitch.
- Stitch Guide FootThis is a presser foot with a ruler attached. The ruler makes it very easy to sew straight stitches and parallel stitching lines. This comes with many markings over it ranging from 3/8 inch upto 1 inch. The outer edge of the foot is exactly 1 inch. The foot is also known as Gauge Presser Foot. You can also use twin needle.


- Satin Stitch FootThis is almost same as the Applique Foot, but a little longer. It is used for decorative stitching or surface embellishment on many types of projects. This foot has a groove at the back that allows raised thread of the satin stitch to pass through very easily.
- Jaguar FootJaguar Foot is almost similar to the all-purpose foot which is used to finish seams, stitch hems, top stitch and sew straight stitch, Jaguar foot is the extended version of the all-purpose foot, but it is little longer. It has a transparent front and a longer edge at the back which gives an extra support to the fabric while stitching.
- Double Welting FootThis foot is used for piping. There are 2 grooves at the back side of the foot. These grooves allow cord to pass through it. You have to adjust the needle position which will allow you to stitch on either side of the cord which is covered with a fabric.
- Invisible Zipper FootThis is an amazing presser foot. It helps you in sewing invisible zippers. It has two grooves underneath the foot to accommodate the zipper coils and to hold them in place as you stitch. By a zipper that is at least 1 and 1/4 inch longer than zipper opening.


- Roller FootRoller Foot can be used to sew thicker fabrics, napped fabrics, heavy knits, leather, vinyl or any heavier weight fabrics that are difficult to feed . It has a large roller at the front and 2 small rollers at the back which provide more traction for your fabrics as it is been fed through the machine.
- Blind Stitch FootIt is the best foot for hemming pants. Hemming is also very easy and beautiful with this foot. It comes with an adjustable bar which makes stitching convenient.
- Applique Stitch FootApplique Stitch Foot is a short presser foot almost 3/4 of the size of the straight presser foot. It makes sewing around curves of the applique pieces very easily. It is made of clear plastic for easier viewing as you sew.
- Darning Presser FootIt is used for form stitching in quilting / thread painting, monogram and even for repairing torn areas. It comes with a spring which makes it easy to sew on fabrics of varying height. With the help of this foot you can do free motion quilting on your regular sewing machine.


- Hemmer Presser FootThis foot leads in finishing fabric edges in a curly manner. This foot is very useful especially for fabric which frays a lot. There are different variants of foot, like 3 mm, 6 mm etc. The edge of the fabric is guided to the curl on the hem foot and then it is stitched with either a straight stitch or a zig zag stitch. There are 2 foot which almost look similar Both the foot looks identical at the front but one has a groove on the back. The foot without a groove makes a flat hem.
- Bias Tape Binder FootThis foot is used to apply bias binding tape to fabric edges. It can be adjusted from 3/8 inches to 3/4 inches. This type of foot can be used to make button loops / ties / straps. The guide in this foot wraps the bias tape around the edges of the fabric.
- Knit Presser FootThis foot is used for sewing with knits. It is also used as an alternative to a walking foot. It helps in sewing knits without stretching them. It works very well with Spandex Knits that are thin, stretchy, soft and fragile. This foot is also known as Tricot.
- Piping Foot or Zipper FootThe foot is most essential when it comes to sewing zippers. This foot is the best as it can sew very close to the zipper teeth. You can move the needle accordingly to stitch on the right and left side of the zipper. When it comes to stitch piping, you can use this foot and stitch very close to the cord.


- Buttonhole Presser FootThis foot can quickly make beautiful button holes without the hassle of doing it by hand.
- Button Presser FootThis presser foot helps you sew buttons very easily. This foot holds the button firmly and you are able to sew the buttons very well. The zig zag stitch is adjusted perfectly to sew the button on to the fabric.
- Gathering / Shirring Presser FootIt is used on lightweight fabrics for gathering. This foot can be used to attach gathered fabric to flat fabrics. This foot helps you to get amazing ruffles and gathers.
- Adjustable Zipper FootAdjustable Zipper Foot is really wonderful. The foot is used for attaching Zipper and also for pipings. It is a variation of the normal zipper foot. You can adjust the needle to left or right to sew both sides of your zipper.


- Walking FootWalking Foot name is derived because it literally looks like the feet are walking. The inside foot in known as "The Needle Foot" which moves separately with the needle. At the outer you have the Presser Foot, which moves independently of the needle and the needle foot. This foot is very important while sewing things like seat covers, anything with form or things that require multiple layers of fabric. It comes handy when you stitch multiple layers of fabric. It has 2 separate foot moving independently. When the needle penetrates the fabric it moves backwards and the other foot holds the fabric together firmly in its place.
- Teflon FootSpecial fabrics like Leather, Suede and Vinyl (Polyethylene Fabrics) require a special presser foot which comes with a no-stick coating. This helps the fabric to flow through the machine easily. There are 2 different types of teflon foot available in the market.
- Standard Teflon Zig Zag
- Adjustable Telfon Zipper
- Ruffler FootThis foot is very useful when it comes to creating pleats and ruffles. It comes with an option to change the depth and distance between the pleats. There is a screw for adjustment, the smaller number creates lesser gathers or small tucks. To increase gathers of deeper tucks you can adjust the number. The fullness of the gathers and ruffles depends on the stitch length.


| Published On | - | 2021-02-25 |
| Modified On | - | 2021-02-25 |
| Author | - | Team WIFD |
| Publisher | - | Waves Fashion Institute |
| https://wifd.in//sewing_machine_presser_foot_guide | ||
Please leave your comments, we love it..!
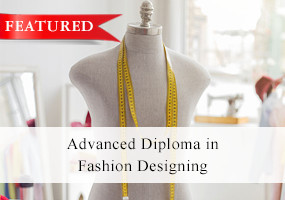
Want to be a fashion sensation? Our practical-oriented course offers individual sewing machines, convenient timing, and industry-focused training. Don't miss this opportunity to create your own fashion empire!
view Advanced Diploma course

Enroll in our Diploma program to master the art of Fashion Design. Explore illustration, design concepts & garment industry insights. With flexible class timings & experienced faculty, kickstart your career in less than a year.
view Diploma course
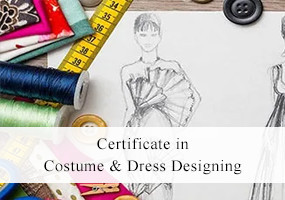
Want to fast-track your costume and dress designing career? Our 6-month short-term course offers practical training, individual focus, and a comprehensive curriculum. Join us and ignite your design journey today!
view Certificate course
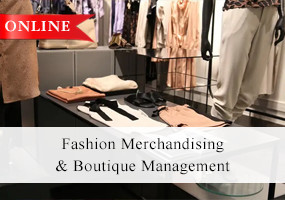
Looking for a fast track program in Fashion Merchandising and Boutique Management? Our 2-month certificate course offers online learning, management skills, and a comprehensive curriculum. Enroll now and become a retail maestro in no time!
view Certificate course

Gender Fluid Fashion Explained : All About It
Learn about Gender-fluid Fashion that transcends traditional gender norms, offering inclusive styles for all identities and fostering self-expression.
Learn about Gender-fluid Fashion that transcends traditional gender norms, offering inclusive styles for all identities and fostering self-expression.
View Story

15 Iconic Quotes by Popular Fashion Designers
Discover the timeless wisdom & style insights from 15 iconic fashion designers. Explore their memorable quotes & be inspired to embrace fashion with flair.
Discover the timeless wisdom & style insights from 15 iconic fashion designers. Explore their memorable quotes & be inspired to embrace fashion with flair.
View Story
Top Sustainable Brands making difference in the Fashion World
Meet the fashion brands that are leading the green revolution. Sustainable, stylish, and making a positive impact!
Meet the fashion brands that are leading the green revolution. Sustainable, stylish, and making a positive impact!
View Story

Vibrant Dress Colors for Ramzan 2024
Elevate your Ramzan style with the best selection of vibrant dress colors for 2024. Get ready to shine in hues that reflect the essence of the season.
Elevate your Ramzan style with the best selection of vibrant dress colors for 2024. Get ready to shine in hues that reflect the essence of the season.
View Story
Hey, we have more amazing content on the latest Fashion, Trends, Paintings & Creative Arts, and now it's absolutely FREE for you. All you have to do, is just... We always respect your privacy!
Popular Fashion Quotes
" You’re never fully dressed without a smile " ~ Little Orphan Annie