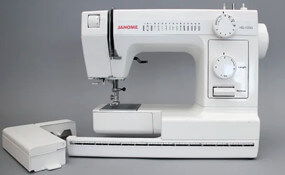
Different Parts & Functions of a Sewing Machine
Sewing Machine plays an essential role in the manufacturing of apparels in the Garment Industry. When it comes to sewing machine, you have many different brands, types and models. They all differ in look, shape, weight and price but all of them have few sets of basic features which are similar. Here we have listed out the common components of most of the sewing machines for your quick reference. For specific details about the machine you can refer the hand book / manual provided with your machine. In case, you have misplaced your manual, you can find an online manual for that particular model. All you have to do is, search online for the model number mentioned on the sewing machine. Before we get into the indepth details, let us first understand what a sewing machines is?
What is a Sewing Machine?
A Sewing Machine can be defined as a uniquely designed machine that is used for stitching different pieces of fabrics together to construct a complete garment. Or in simple terms, it means to join different materials together with a thread. A sewing machine can create wonders as it helps us to create beautiful garments in superior quality within a short span of time. Another important reason is that it can reduce a lot of effort in the production of garments.
The mass production of machines started in 1850, when
Sir Isaac Merritt Singer, an American inventor, actor, and businessman invented the machine that was commercially successful.
Some popular Sewing Machine brands available in India are
Singer, Usha, Brother, Janome, Merrit, Jack, Juki etc...
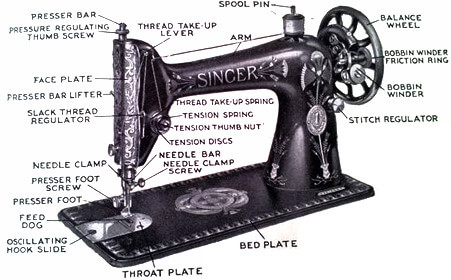
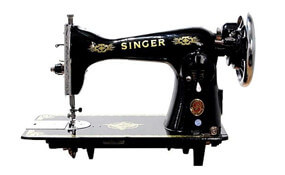
Different Parts of a Sewing Machine with Pictures
There are various parts in a Sewing Machine and each part is related to one another. You may be already aware of certain parts such as sewing foot, pedal, bobbin, bobbin case etc as they are commonly used terms.
List of Sewing Machine Parts: - Main Parts of the Sewing Machine
- Head
- Arm
- Bed
- Hand Wheel
- Face Plate
- Needle Plate / Throat Plate
- Sliding Plate
- Presser Foot
- Presser Foot Lifter
- Feed Dog
- Stitch Length Regulator
- Presser Foot Pressure Controller
- Reverse Sewing Lever
- Pressure Bar Spring
- Parts used in upper threading of the machine
- Spool Pin
- Tension Regulator
- Thread Guides / Guide Hooks
- Thread Take-up Bar
- Needle Bar
- Needle & Needle Clamp
- Parts used in lower threading of the machine
- Bobbin
- Bobbin Case
- Rotatory Hook (Oscillating Hook)
- Lower Tension Regulator
- Bobbin Winder
- Stop Motion Screw
- Rubber Ring
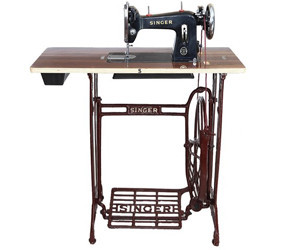
- Parts in a Treadle / Pedal machine
- Drive Wheel
- Treadle
- Pitman Rod
If your next question is - "
Which is the most important part in a Sewing Machine?", it would be really tough to choose one. A sewing machine is designed in such a way that almost all parts are equally important. A malfunction in any one could cause the machine to work improperly.
Functions of Sewing Machine Parts
1. Head The
Head refers to the complete sewing machine excluding the stand or the cabinet.
Head of the machine has two main parts:
Arm &
Bed 2. Arm The Arm is the curved part of the Sewing Machine with a mechanism for driving the needle and handling the upper thread.
3. Bed The Bed is the flat portion of the head under which is mounted the shuttle, feed and lower thread handling mechanism.
4. Balance Wheel / Hand Wheel Balance Wheel, also known as Hand Wheel, is on the right side of the head driven by a belt or a handle. It raises and lowers the take-up lever which is used to move the needle up and down. While manually operating the Hand Wheel, it should always be turned towards you, even when using a reverse stitch.
5. Face Plate It is on the left side of the machine which covers oiling points of the needle bar, presser foot bar and the take-up lever.
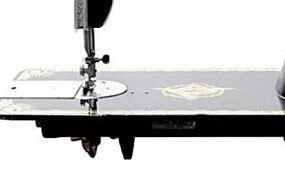
6. Throat Plate / Needle Plate Throat Plate also known as Needle Plate is a semi-circular disc with a hole placed between the presser foot and bobbin case. The needle is allowed to pass through it. It provides a level surface to the cloth and prevents dirt from entering the inner mechanism of the machine. Most throat plates have small lines marked to the right of the presser foot. These serve as guides for seam allowances and for sewing straight lines. The plate can be detached manually to clean and remove pieces of thread caught inside.
7. Sliding Plate Depending on the machine, a slide plate or hinged bobbin cover allows access to the bobbin.
8. Presser Foot A presser foot is a detachable part which is used to hold the fabric in the right place over the throat plate, so that fabric does not slip. It keeps the material flat and tight for proper sewing and lets you guide the needle smoothly through the fabric. In some cases, you will have to change the presser foot according to your requirement. Different types of presser foot are available for different functions such as zipper foot, button hole foot etc.
9. Presser Foot Lifter It is the lever attached to the presser bar, located above the presser foot at the back or side of the machine, which raises and lowers the presser foot. When the presser foot is lifted, the tension discs are disengaged, and the fabric will not be fed through the machine. It must always be lifted to take out the fabric from the machine and it should be lowered while stitching.
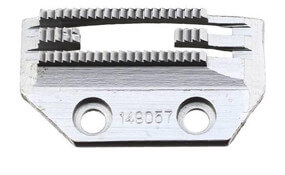
10. Feed Dog Feed dog is a metallic part which helps to feed the fabric forward and backward between the presser foot and throat plate using its teeth. It is not a prominently visible part in a sewing machine. The feed dog must be immediately replaced when damaged. During locking and reverse stitching, the feed dog feeds the fabric in the reverse direction. Do not use your hands to push the fabric and always allow the feed dog to control the movement of the fabric. Manually pulling or pushing the fabric may cause the needle to bend or break. When the machine is working the feed dog moves upwards and advances the fabric as each stitch is made. They move faster or slower depending on how hard you press the pedal.
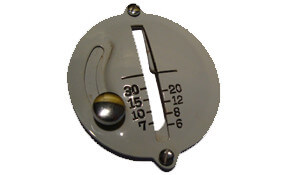
11. Stitch Length Regulator This is a regulator by which you can change the length of the stitches. Gradation marks present in the lever indicate the length of the stitches. Stitches are measured differently, depending on the machine. For general sewing, use medium-length stitches, for fine fabrics use shorter stitches and for heavier fabrics or when basting or gathering use long stitches. In ordinary domestic machines you can stitch forward or backward by adjusting this lever up and down.
12. Presser Foot Pressure Controller Presser Foot Pressure Controller adjusts the amount of pressure the presser foot applies to the fabric as it feeds the fabric beneath the needle. We should adjust the Presser Foot to decreases pressure when sewing heavy fabric and increases pressure when sewing lightweight or thin fabric.
13. Reverse Sewing Lever This is the lever or button which allows you to sew backwards when pressed. The feature is not available in ordinary domestic machine.
14. Pressure Bar Spring This is a spring which controls the pressure asserted by the presser bar.
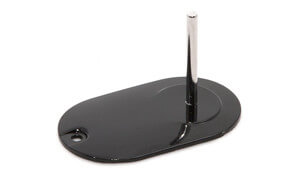
15. Spool Pin It is the upright metal rod fitted on the top of the arm to hold the thread reel. The spool pin keeps the thread in place while the thread is feeded to the needle. Few machines come with multiple spool pins for decorative or twin needle sewing. It can either be vertical or horizontal. The horizontal ones provide smoother thread feed.
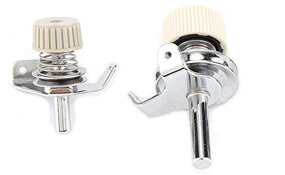
16. Tension Regulator This is a mechanism fixed to the face plate for controlling the quality of the stitches. 2 discs are put together facing the convex ends, the thread is made to pass between these two. The tension of the top thread is adjusted by a spring and nut which increases or decreases the pressure on the disc. To get uniform stitches, both the top and bobbin thread tensions should be properly adjusted. If the tension is set too tight, the stitch will pucker and break and if it is set too loose, the stitches will not hold the fabric properly. Turn the dial anti-clockwise to decrease and clockwise to increase the tension of the upper thread. Tension discs and spring should be changed if damaged. Remember that you have to clean dust often from the tension discs, else you may get an improper stitch on the fabric.
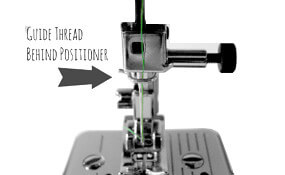
17. Thread Guides / Guide Hooks Thread Guides are multiple loops, discs or flat metal shapes starting from the spool pin till the needle. The thread passes through these metal loops without tangling which help the machine to regulate the tension of the thread. If the order of guiding the thread to the needle is incorrect, the thread will get tangled.
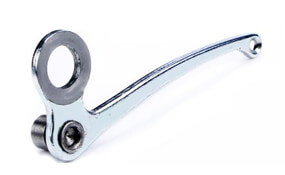
18. Thread Take-up Lever / Bar This is a lever fitted to the body of the arm above the tension regulator. It moves up and down. At the outside end of the lever is a small hole through which the thread passes. There are 2 functions for this lever...
- To feed the thread to the needle.
- To tighten the loop formed by the shuttle. As the lever moves down, it releases the thread to interlock with the bobbin thread. As it rises, it tightens the thread to form a firm stitch.
The visibility of the take-up lever depends on different machines. It either protrudes from the front or is hidden inside a casing. This lever is always at the top when you start sewing and end sewing.
19. Needle Bar The upright bar at the lower end of which the needle is attached. A needle clamp screw on this bar holds the needle in place.
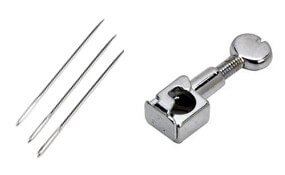
20. Needle & Needle Clamp A needle is a pointed metal which has a small hole. A needle consists of 5 parts which are Shank, Shaft, Front Groove, Point Scarf and the Eye. Upper part of the needle is called Shank and lower part is Shaft. One side of the Shank is flat and the other side is round. On the round side is the groove which guides the thread to the needle while forming the stitch. On the flat side towards the end of Shaft a cut shape is there known as Point Scarf. Eye is at the end of the needle. For speed machine round needle is used. Twin needle is used for making parallel lines. Needles are made of steel, coated with chrome or titanium which are removable and come in a variety of size and shape. Needle Clamp & Screw hold the needle in place. Needle clamp screw is used to tighten and loosen the needle by a screw driver to release or secure the needle in place.
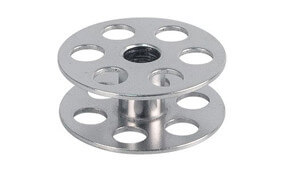
21. Bobbin Bobbin is one of the most integral part of the sewing machine. It is a small plastic or metal spool used for winding the thread. Bobbin supplies the bottom thread during the stitch formation. You can refill the bobbin with the desired color of thread when it is finished.
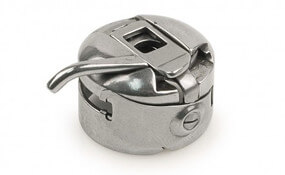
22. Bobbin Case Bobbin case holds the bobbin. The hook of the bobbin case catches the previously made needle loop and moves over the bobbin case. It helps to form a stitch by interlooping of needle thread and bobbin thread. Bobbin case varies in different models of sewing machines. In few machines, bobbin is inserted through the front and in some case from the top. There are machines which come with in-built bobbin cases.
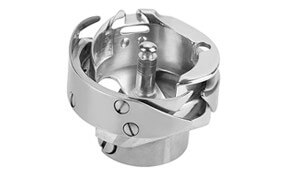
23. Rotatory Hook (Oscillating Hook) The container in which the bobbin case is placed and around which the loop of needle thread forms the lock stitch.
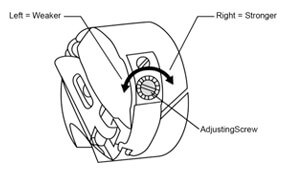
24. Lower Tension Regulator The spring on the Bobbin case which controls the delivery of the thread from the Bobbin. To tighten your bobbin tension, slightly turn the tiny screw on the bobbin case clockwise. To loosen bobbin tension, turn the screw anti-clockwise.
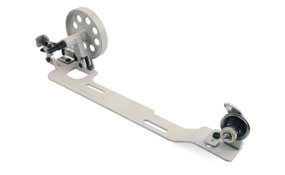
25. Bobbin Winder It is a mechanism for winding thread on the bobbin and is generally located at the right-hand side near the wheel. An empty bobbin is placed over the winder and the thread is filled from the spool. Always start with an empty bobbin, to ensure that the thread is uniformly wound.
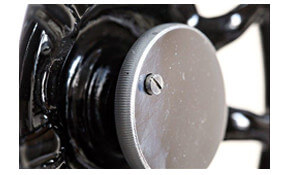
26. Stop Motion Screw It is located at the center of the Balance Wheel / Hand Wheel. It is a mechanism used while winding the Bobbin with the Bobbin Winder so that stitching is temporarily stopped.
27. Rubber Ring Rubber Ring is seen on the Bobbin Winder. It makes contact with the nut of the balance wheel. If this is allowed to become oily, it will fail to have a proper contact and then it should be replaced.
28. Drive Wheel It is a large wheel located under the board of the machine. It is connected to the Balance Wheel by a leather or synthetic band and transmits power to operate machine.
29. Treadle The foot rest at the base of the machine in a pedal / treadle machine to control the stitching speed. You should always maintain a even and steady speed throughout.
30. Pitman Rod It connects the treadle and the drive wheel so that as the treadle is operated the drive wheel revolves.
Other Essential Items for Sewing
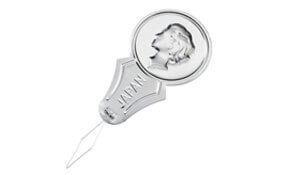
1. Needle Threader A needle threader is a device which helps to insert thread through the eye of a needle.
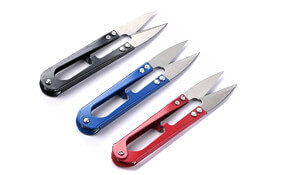
2. Thread Cutter Thread cutter is used to remove the stitched piece from the machine. Most of the sewing machines have thread cutter blade in needle area.
3. Accessory Box It is a pull out box on the left side of the machine under the table-top. It acts as a storage for sewing accessories like presser foot, bobbins etc. If few machines like Fashion Maker, it is located on the left side just under the needle and it also acts as an extended table for your fabric to rest while sewing.
Precautions to be taken while working on a Sewing Machine
- Needles are really sharp and could harm you, so please do take necessary precautions before you start working on a sewing machine. While you guide the fabric over the throat plate, make sure you always keep your fingers 1-2 inches away from the presser foot.
- Remember to take your foot away from the sewing foot controller while you pause between stitches to avoid accidents.
- In case of an electric machine, remember to TURN OFF the machine completely during longer breaks between garment construction. It also helps in increasing the life span of the machine and the small light bulbs in it.
- To avoid needle from snagging the fabric, raise the take-up lever completely before placing the fabric under the presser foot.
| Published On | - | 2020-12-10 |
| Modified On | - | 2020-12-12 |
| Author | - | Team WIFD |
| Publisher | - | Waves Institute of Fashion Designing |
| https://wifd.in//parts_of_a_sewing_machine_and_their_functions_with_pictures |
